Every once in a while someone asks us how we go about some of our work on the farm. Sometimes, the pictures I have line up nicely and I can share some of it. Sadly, I didn't take the time to take photos of some of the equipment. so, you'll have to use your imagination for some it. I
blame the blackflies for our lack of desire to take pictures so far in late May into early June.
 |
| Steps 1 & 2 |
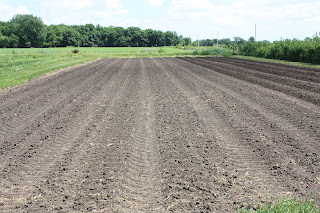
This year, we added the nifty power harrow to our arsenal (you can read more about it in our
recent June newsletter). We worked in cover crops (and weeds - of course) using the power harrow in this field (step 1). Once we did that, we used the tractor to mark our beds in this plot (step 2). Since we're trying to keep beds consistent with the size of our tractor for ease of cultivation and other future work, this makes sense - even if it costs a little compaction. Each of our plots in the Eastfarthing (amazingly, this is the eastern part of our farm... we're so creative...) have the space for 13 beds - in theory. Over time, things don't stay perfect, so a couple of fields are more like 12 and a half beds. We're finding that the power harrow will likely help us keep the edges of our fields cleaner.
 |
| Steps 3 through 5 |
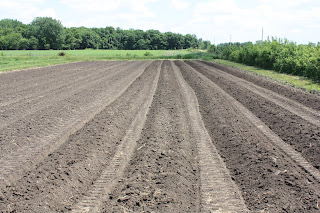
Melons are often heavy feeders, they don't typically like 'wet feet' and they need a certain amount of heat to reach maturity. We have considered hilling them over the years. In fact, ten years ago, when we grew a fair amount less, we raked dirt into row hills and seeded directly into those row hills. Once we started growing over a thousand row feet of melons, we decided using a garden rake to make row hills was no longer a good idea.
We used our simple hiller on Rosie (the tractor) and created row hills that are only slightly smaller than the bed size (step 3). The soil is a little rough at this point for planting. It would probably be fine if we were using a mechanical transplanter - but we aren't at this point, so we like a slightly finer tilth just to make it easier on our bodies. That means we run over each hill once with Barty (the BCS tiller - step 4) to make the planting area human friendly. Also, the finer tilth helps to better cover the root balls of the transplanted melons. We then use our wheel hoe to create a shallow indentation the length of the bed (step 5).
This whole process gets the melon plants slightly above the soil surface of the surrounding areas. If we get a heavy rain, this should keep the plants' roots above the 'it's too wet' danger zone. Also, the hills tend to increase the temperature slightly at least early in the season.
 |
| Step 6 |
In order to address the fertility issue, we fill the shallow trenches with finished compost (step 6). At this point, this process is more time consuming than we want it to be. But, we'll make adjustments in the future. We're also thinking it might be nice to be able to filter out some of the sticks that are inevitably going to show up.
 |
| Step 7 and 8 |
We like to lay our drip tape (and set up the header, of course) before planting because it gives everyone a guide for planting the seedlings (step 7). Also, if you start the line a little bit prior to planting a row, you reduce transplant shock by getting water on the new transplants quickly. As we plant the row, we use the excess soil on the sides of the shallow trench to help cover the new plants (step 8).
The row in the center of the picture above is reserved for our borage planting. We will seed it in directly in a single, densely planted row. This hedge serves to attract pollinators, add some beauty AND provide a barrier so different varieties of melons don't decide to get in each other's way. This is only important if you're trying to harvest without harming a later maturing crop (which we are).
 |
| Our goal |
We hope to report back in late July and August that this field is looking like this one did in 2015!


No comments:
Post a Comment
Thank you for your input! We appreciate hearing what you have to say.
Note: Only a member of this blog may post a comment.